Friday, January 28, 2011

Experiments!

Making a list...


     So I've been stocking up some materials for some experiments. Of course recently I was consumed with painting white. I have one more test figure locked and loaded for that with my final test. Thanks to your comments, dear readers, I've picked up Vallejo Ghost Grey. I'll be using that very soon. Here are a few other tests I have coming up:


Vallejo Airbrush Primer


     I've been wanting to try this stuff out. I've finally got my hands on some and I'm going to test this out. I have quite a lot of minis waiting to be painted so I'll be testing it on a mix of infantry and vehicle models.


Airbrushing Camo Patterns on Vehicles


     This means the long awaited vehicle phase of my Imperial Guard Army is finally upon me. That means I'm going to have to get used to painting camo patterns on vehicles. I'm opting to use an airbrush and masking techniques to get the job done. I'm sure it'll be a learning experience, so before I go slapping paint on GW models I'm either going to try it out on some cheap toys (that might work well as terrain pieces) or just on flat cardboard. Of course the toy idea sounds more interesting to me.


Vallejo Weathering Powders


     So when I placed my order for the Vallejo Airbrush Primer, and some various other paints, I thought I'd take a look at the weathering powders. It seems like an interesting concept, and I've liked the results I've seen in other peoples' work. I of course had heard of the Tamiya weathering kits, but I noticed that Vallejo had kits as well. The Vallejo kits had better color choices, for me at least, and I picked the one you see in the imagine at the top of the section. If I get a toy to test out the camo, I'll be sure to test the powders on that as well.


Actually Playing 40K


     Yeah, I realized the other day that it had been a horribly long time since I last played an actual game of 40K. I've decided that it was shameful, so I'm going to take a little break from all this painting for the next two weeks and actually get some games in. I'll most likely be taking my Orks back out, as I'm planning on selling my Space Marines, and I would hate to play a few games and then change my mind.
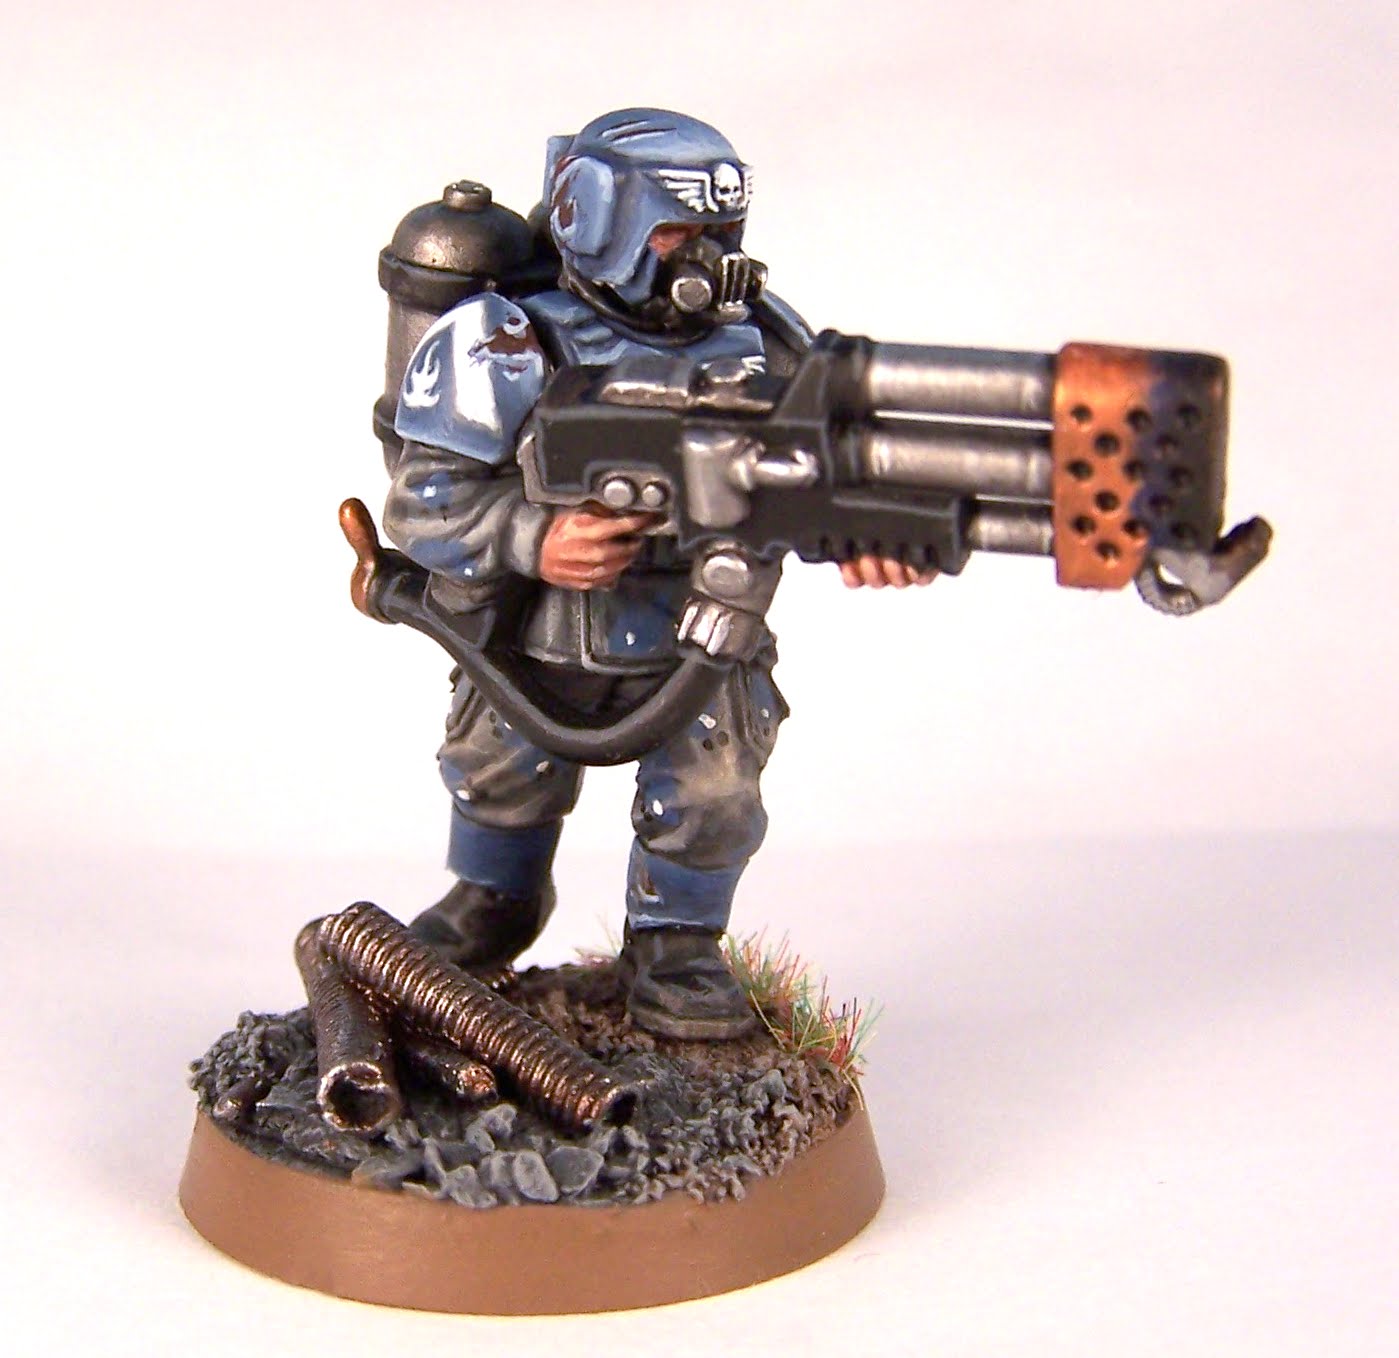


Selling My Marines

     Which reminds me, if you're interested in my Marines, let me know. It's a terrific starter army, as it has a little of everything one would want to base an army. I've got about 1850 points, the whole army is painted (better than tabletop quality, I think) and I'll likely throw in the Battle Foam trays, and even the Pack 432 if you're interested (I'll likely have to move to a larger bag with this IG army... Vendettas and Valks are BIG!). Name your price, and we'll talk it out. Quick list of what I have:

Infantry
1 AoBR Captain
1 Assault Chaplain (It pains me to sell this... he's one of my all-time favorite models)
1 Command squad w/Standard bearer, Champion, and Apothecary with all vets geared with CC weapons.
2 x 10 man Tactical Squads w/ Missile Launchers and Flamers
1 10 man Assault Squad w/ 2 Plasma Pistols and Sarge with Powerfist and Shield
5 man Sniper Scouts with Camo Cloaks (converted with hoods and all have night vision goggles)
1 Telion (for above mentioned scouts)
5 AoBR Terminators

Vehicles
1 AoBR Dreadnought
1 Whirlwind
3 Rhinos (Doors magnetized such that you could covert into Predators or whatever)
1 Predator (All options magnetized)
1 Vindicator

     That's it for now. I'll try and get a post up about some of my games as soon as I can. Hopefully I remember to take a camera, maybe get a few shots of the "action"... if you can call it that.

Saturday, January 22, 2011

Whiter still!


     That's right, I've continued to strive towards a method of painting white. This represents my best results thus far. I used Space Wolf Grey, actually I used Vallejo's Wolf Grey. Same difference. I based the whole model with that, used a Badab Black was over the whole model, repainted with the Wolf Grey (leaving the darker nooks), and then finally highlighted with white!

     I think the effect is very pleasing. I'm sure it doesn't look pure white, but that's just fine. Standing on its own, it truly looks white! What's more, I can highlight it!

     I decided to make him a White Scars marine. No particular reason, I suppose, but it was a fun experiment and I feel confident I can improve on my technique with time. Here are some more pics:


Micro Glazing


     I'm not sure if you've heard about this technique, or if you have heard, if you've used this. For those of you not familiar with it, essentially you're laying very very VERY thin paints to form a smooth blended look. I watched a little clip on YouTube, and I actually tired it in practice on one of my previous "white" marine attempts. The effect was quite amazing. Here's the clip I saw:


     I didn't use the larger amount of colors as he did. Essentially I just took the highest highlight on that model, and used a super thinned down version of that and used large smooth brush strokes to apply it to the model. I was dubious that I would see anything on the model, but with a relative short amount of time, I could see the pigment building up rather smoothly exactly how I wanted it.

     Obviously this technique isn't for every model in a 2000 point army, but I think it can add a little fanciness to some of the more important characters in a list. I'm going to give it a whirl on some future models, see how I like it. I'll let you know how things go.

     That's all for now. I'll be back to my Guard tomorrow. I had ANOTHER flat tire this evening, so I need to get that taken care of, along with some other errands. We'll see how enthused I am about painting after all that. Thanks for reading! Comments and questions are always appreciated!


Friday, January 21, 2011

White Hot Rage!


     I'm ready for my close-up! So I've been experimenting. A friend of mine has asked me to paint his army, there's money involved, and I don't want to let him down. The request he has made, frankly, sounded like a bit of a challenge, but one I pretty much asked for.

     White marines. Ugh! What have I gotten myself into. So far I have "finished" two test models. Both were learning experiences. I tried the following recipes:

--First Attempt--
Based Codex Grey
Badab Black wash
Went back over with Codex Grey, leaving the darker areas
Went over the whole model with Fortress Grey
Went over most of the model with Skull White

--Second Attempt-- (Les Bursley from Awesomepaintjob.com's White Scars Tutorial)
Based Fortress Grey
Badab Black wash
Went back over with Fortress Grey
Edge Highlighted with Skull White

     The first attempt was less than satisfactory. The white simply became chalky, even with the very thin coats. Though the overall color was about what I was looking for, it just wasn't good. I didn't bother taking a photo of it.

     The second attempt was much better looking, but obviously not white. Just wasn't white at all. It was light grey, sure, but no mistaking that for white at all. Now having watched the aforementioned tutorial over, I was more confused than ever. His "Fortress Grey" was SUPER light. Looked like white, or very nearly enough white. He only highlights a few areas in the video with Skull White. The end results he got were very different from mine.

     I haven't given up yet. I have a few more tricks up my sleeve. I'm going to try basing with Space Wolves Grey, then covering that with a 50/50 mix of Space Wolves Grey and Skull White. I'll then edge highlight with Skull White. I think this will not only give a close-to-white look, but it'll have a slight blueish tint that will like a little "icy."

     Nevertheless it had been a while since I had put a paint brush on a marine model, and it felt really good to complete one again. I've only been doing this hobby for a little less than two years, but it seemed a little like coming home. I was happy to complete these tests, but I'm really looking forward to some more trials and possibly some better results. I'll keep ya posted. In the mean time, here are some more shots of my test model from attempt number two:

Sunday, January 16, 2011

Mr. Melta Man


     Hello everyone! Finished my Melta Gunner for my command squad. I liked the scarred head. Had to use it. I had to work on my stubble technique a little. One large change was a little bit of stippling of a slightly darker shade to create some slight variation across his head. Came out pretty good.

     With this guy done, I have only one more model to complete my command squad. Mr. Vox caster will be next. I've got a good lead on an airbrush compressor and that will be critical to some ideas I have for my vehicles and some various other projects.

Local GW store closing...


     So I had mentioned some issues that I had with my local GW. Imagine my surprise when stopping by and discovering via a little flyer on their counter that they are closing up. I seems that the mall is jacking up their rent, so they really had no choice. I heard that the battle bunker that was closed a few months back is being reopened within the next year. Of course that has been and on-again-off-again rumor and a now don't know what to believe.

     The MOST interesting result of the announced closing of this store has been my interaction with the employees that ARE NOT being relocated. They are now awesome. They don't ask the silly canned questions and feigned interest held only long enough to make a product recommendation. I stopped by the store today and it was a great experience. More like hanging out, than trying to avoid the silly sales pitches. Turns out, when you turn the GW-ness down just a bit, the atmosphere of the store changes for the better.

Forge World stuffs...


     I've decided that I'm going to start a Red Scorpion army. I got some of my first bits from Forge World. They made a small mistake and sent only one upgrade kit when I had ordered two. Thankfully, the stellar customer support has sent out the rest of the order via express delivery. On a slightly related note, a friend of mine received his copies of the Badab War books, and they seem incredible. I haven't seen them, but he has read through some of the awesome rules and scenarios in those monsters. I'm a little sad that many 40K fans might never enjoy these. I'll endeavor to bring some of these to a table soon.

New Camera...

     My wife purchased a new point-and-shoot camera. A Canon Powershot, to be precise. I tried it out on the photos you see here. Interestingly enough, I think I'll stick with my old Kodak. The color balance is a little weird. I'm sure that I could have negated that with some trixy editing, but as my computer is still broken, I don't have the needed tools to do so. The other interesting problem  with using this camera is the face detection. It detects the "face" on my model and forces the camera from macro mode to portrait mode. This bit of software is annoying as the focal logic is very different in these two modes. So there IS such a thing as a camera that is TOO smart. I did take a funny pic with the camera, and with that I'll leave you to my most recent shots of my Melta Gunner:

 "Bring It Down" - This order allows all weapons in the unit to be fired as if twin linked against the a target vehicle or monstrous creature.


     That's it for now. Hope you enjoyed, and as always feel free to leave question, and comments.

Saturday, January 8, 2011

Someone Call for a Flame Slinger?


     Heavy Flamer COMPLETE! He looks pretty good. Interesting fact: This is the first Heavy Flamer of any sort that I've painted. None of my Space Marines have them. Oh wait... ummm... okay so Ork combi-skorchas are technically the same weapon profile as a heavy flamer. Bah whatever.

     So I liked the respirator on this guy. The respirator doesn't really fit the guard models very well at all. Essentially you'd have to model all of the guys wearing the full respirators in the same head/torso position. It would look very static indeed. I decided to just cut the little hose off and leave it with just the mask. Even then I actually had to do some rhinoplasty to make it sit right.

     I moved along pretty fast while painting him, right up until I got to the tanks. I had to think about that for while. What color would the tanks be? I felt that black would just make the overall model too dark. Red was the obvious choice but I've gone through all the work to make them all wearing camo, so bright red tanks on his back seemed a little silly on second thought. In the end I did the Boltgun Silver. I darkened the base coat really heavily with a wash. I then took my Fine Detail brush and did small scratches with the original Boltgun color. I then mixed some Mithril Silver in and repeated that, and finally just pure Mithril. I added in a few scratches of Kommando Khaki and Graveyard Earth. I figured this would give a slightly more worn look to the tanks. Came out alright, I think.

     The nozzle on the flamer was another challenge I had setup for myself. I had seen some other flamers out there where the painter had shown some "blueing" on the metal. I liked the idea. First I tried using very thin coast of Ultramarines Blue. That wasn't turning out exactly how I wanted. I then decided to try layers of Azureman Blue wash. That did the trick. It might not be as obvious as it was intended, but I'm happy with the experiment. I finished it off with a little drybrushing of black, and then an even lighter drybrushing of the original basecoat of copper.

     The last challenge on the model was the right shoulder pad. The plasma gunner that I just previously finished had a nice custom shoulder insignia. It was a chevron with a nice little starburst to represent the he was a veteran and a plasma gunner. Seems like a cool idea. But for some reason the heavy flamer arm did not have this logo. The regular flamer DID. So I decided to freehand my own! I'm trying to stretch my free hand abilities a little more each time. Turned out pretty well, I think, and it helped build some confidence for some ideas I have for upcoming models.

Here are some more pics:


     I still have a broken computer. Two RMAs and two broken boards sent to me. I'm beginning to think that they just have a stack of these boards, all with the same problem. A new broken one comes in, they just throw it on the pile and grab another one and send it out. For all the testing they claim to do, they certainly can't be doing more than simply plugging the power up to it and make sure it merely accepts power... not if the thing actually BOOTS!

     That's it for now. Hope you enjoyed it and I'll be working on my command squad's Melta Gunner next. See you then!